The past few weeks have been a whirlwind of activity at VMware with the launch of the new vSphere 7.0 suite of products, including the latest version of NSX-T! My home lab has been a flurry of activity the past two months, including being the home of several varieties of Kubernetes clusters and the full suite of vRealize products as I dive into all the new technologies. The current plan for the lab includes leveraging Tanzu Grid Integrated Kubernetes (TGIK), Tanzu Mission Control, and Tanzu Service Mesh. The first step to all of these fresh goodies is getting NSX-T 3.0 into the lab.
As a reminder, here is the current NSX-T logical design within the Home SDDC Lab.

Prerequisites
As with any lifecycle activity within an SDDC environment, there are invariably a few things that should be done prior to performing any upgrade. Depending on your specific environment, those steps may vary. Within my own small-scale lab environment I needed to do the following:
- Validate backups of the SDDC Manager were completing to the AWS S3 object store.
- Disable DRS VM/Host Rules that were set for anti-affinity across the 3-node cluster.
- Validate passwords are not expired in NSX Manager or vCenter Server.
- Validate certificates are not expired.
- Verify compatibility for NSX-T 3.0 with all the components within the SDDC environment.
Note: If you are leveraging Enterprise PKS 1.6 or 1.7, it does not currently support NSX-T 3.0
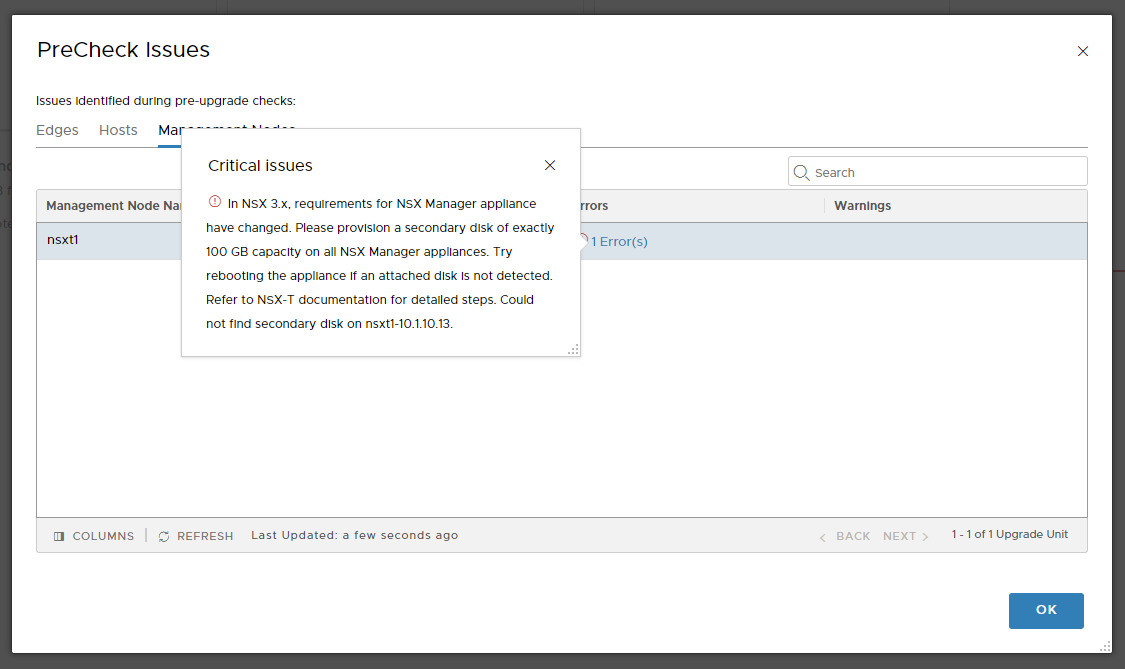
Beyond those housekeeping items, one requirement for the upgrade is adding a 100Gb second disk drive to the NSX Manager VM. This was caught during one of the pre-checks as part of the upgrade process.

Note: After adding the second disk to the NSX-T Manager VM, I had to reboot the VM to have the OS recognize the change.
Preparing the NSX-T 3.0 Upgrade
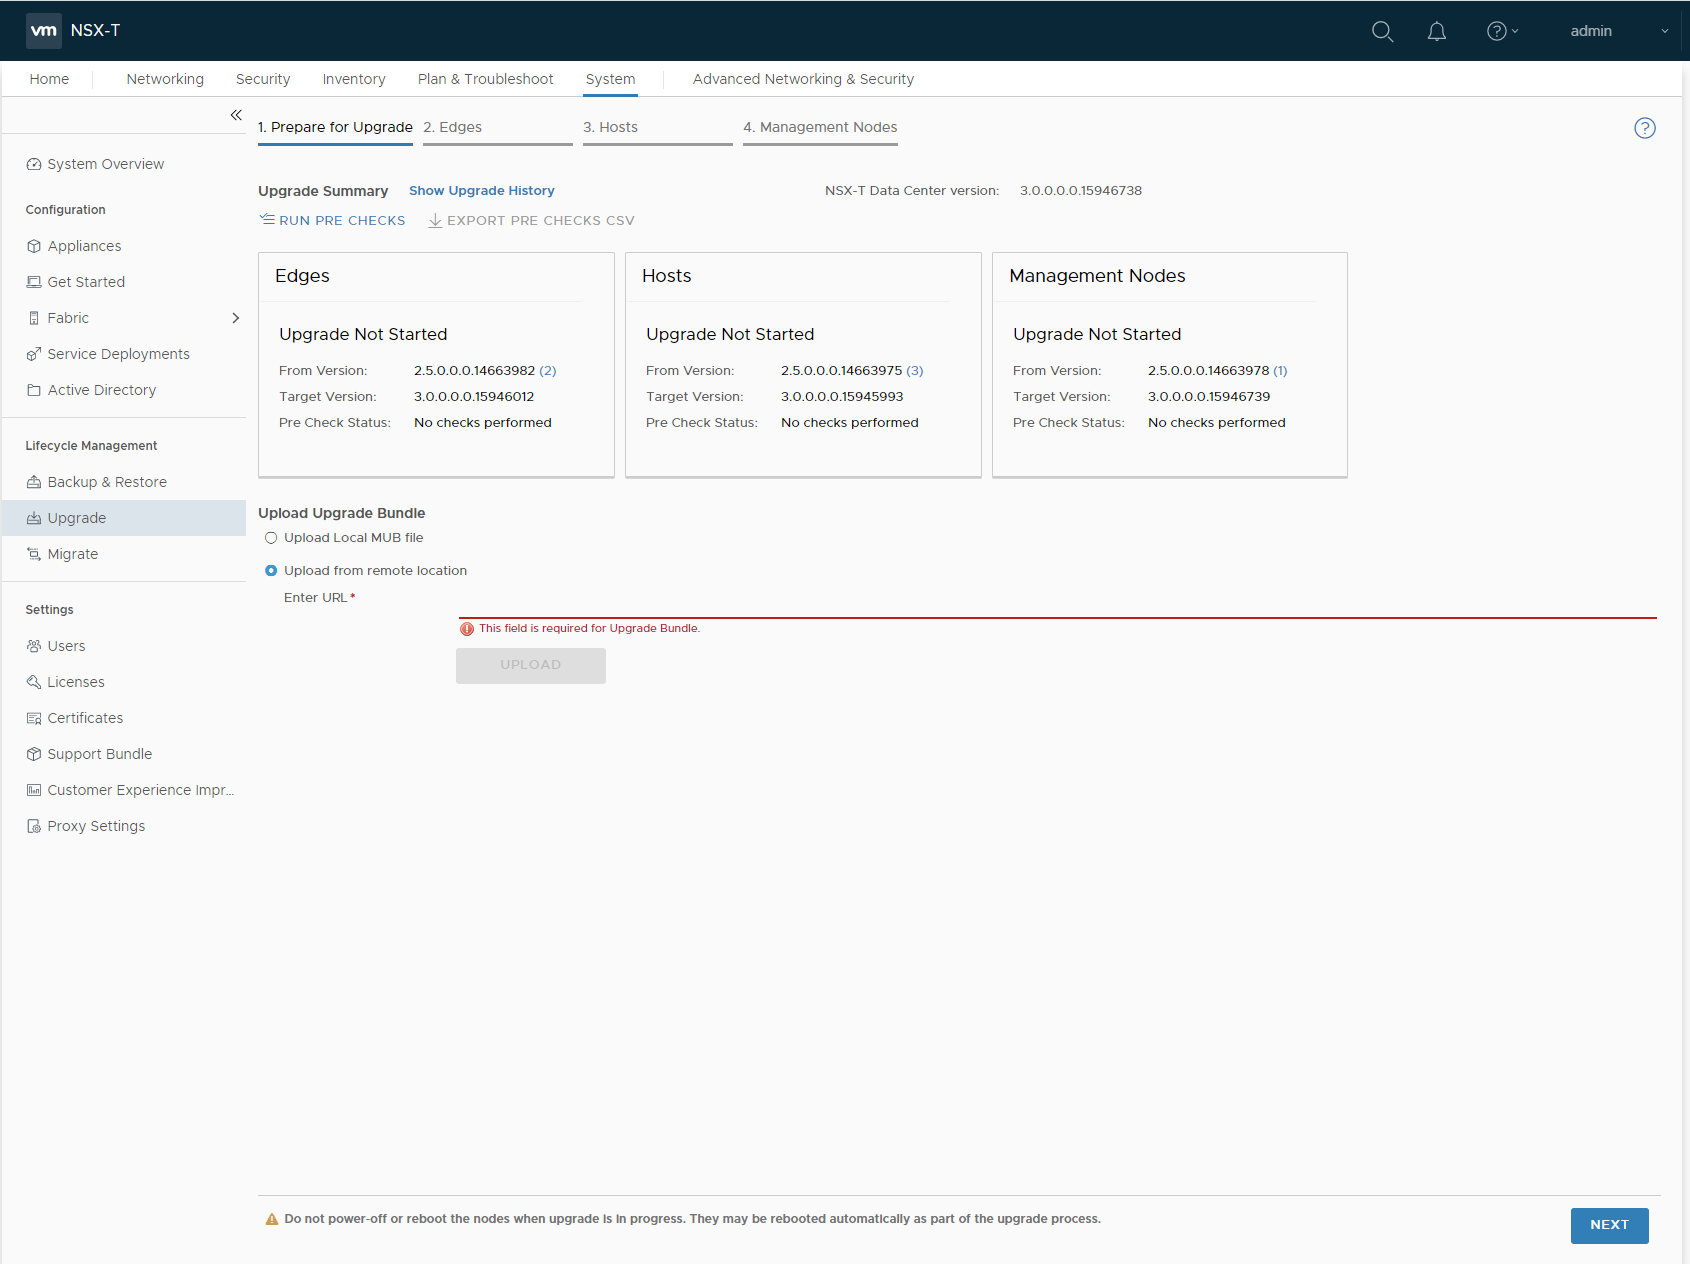
After completing the prerequisites step is to download the 8Gb MUB file my.vmware.com and log into the NSX-T Manager. From there select System –> Upgrade and proceed to upload the MUB file. Depending on where the NSX-T Manager is, network bandwidth, etc. this will likely take a few minutes.
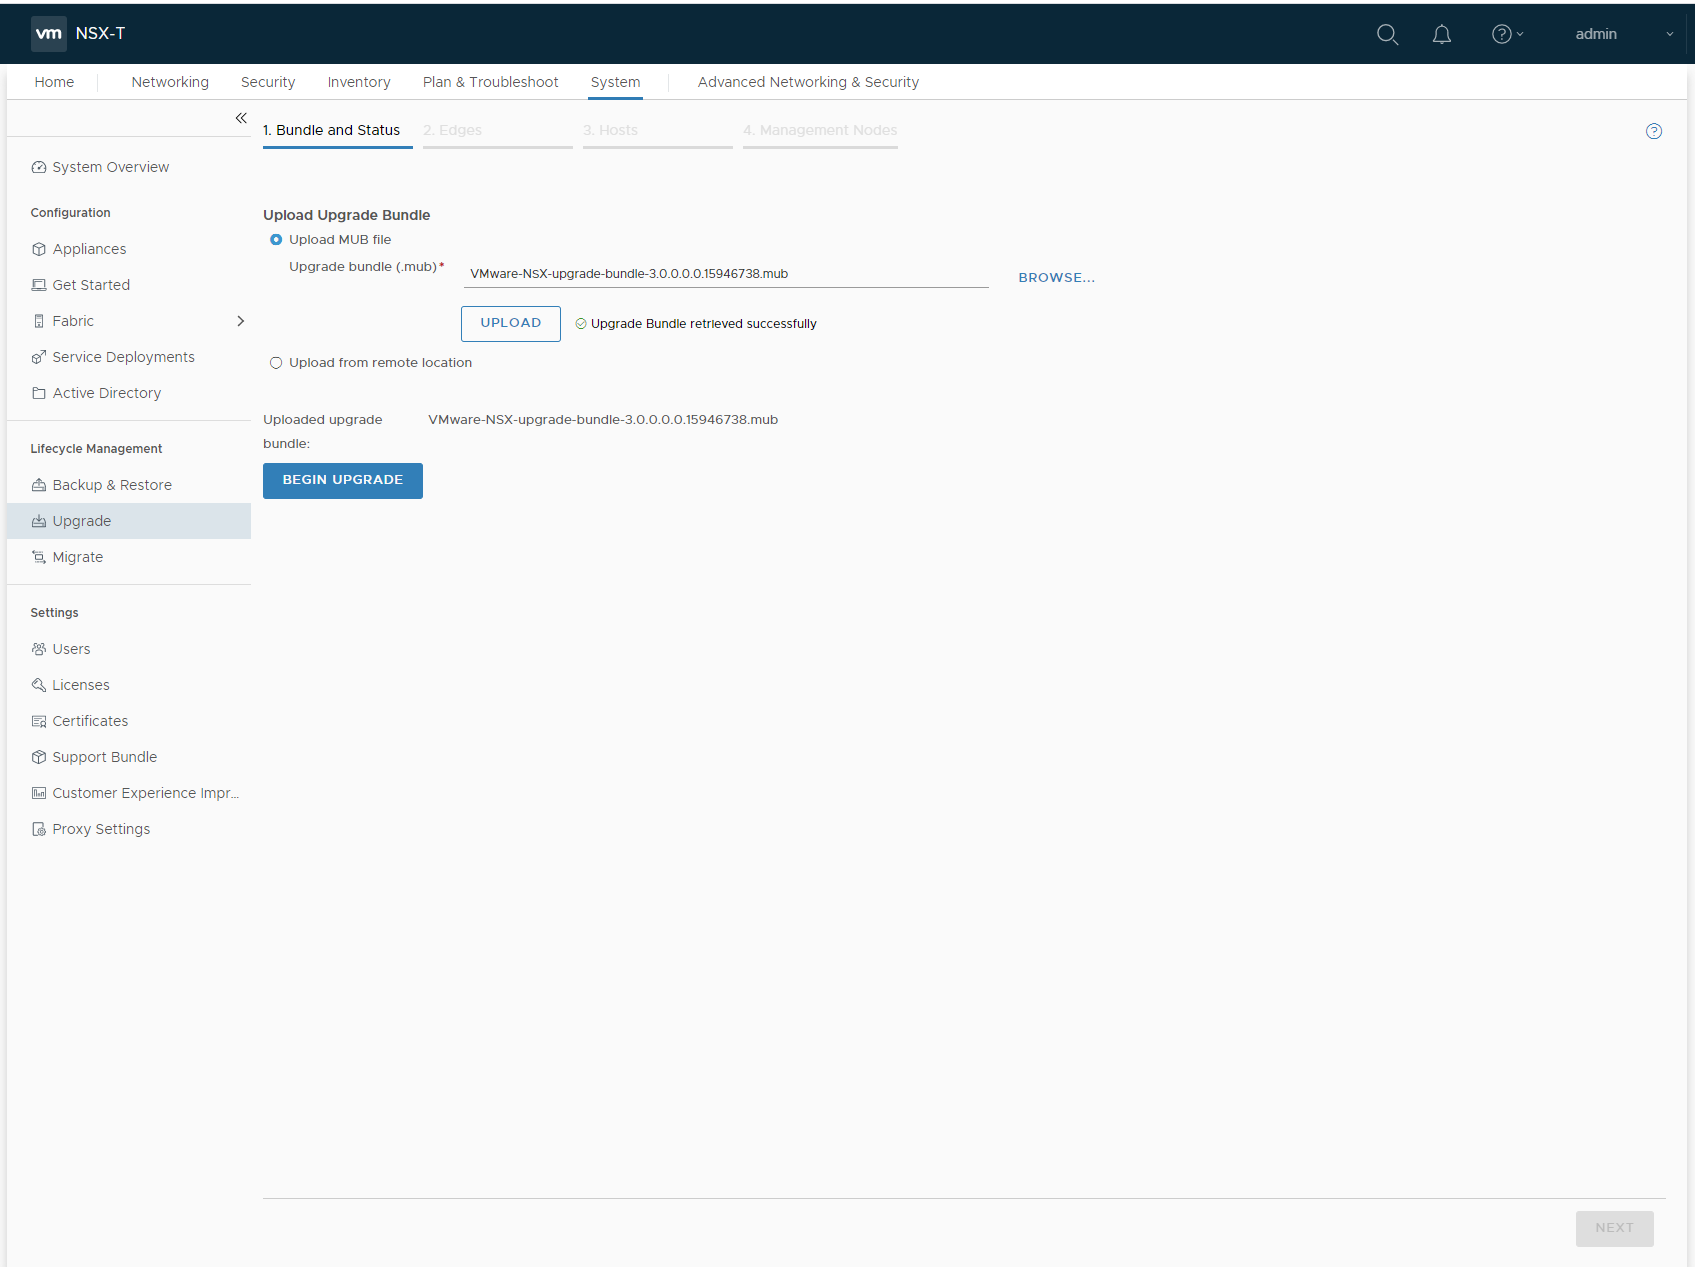
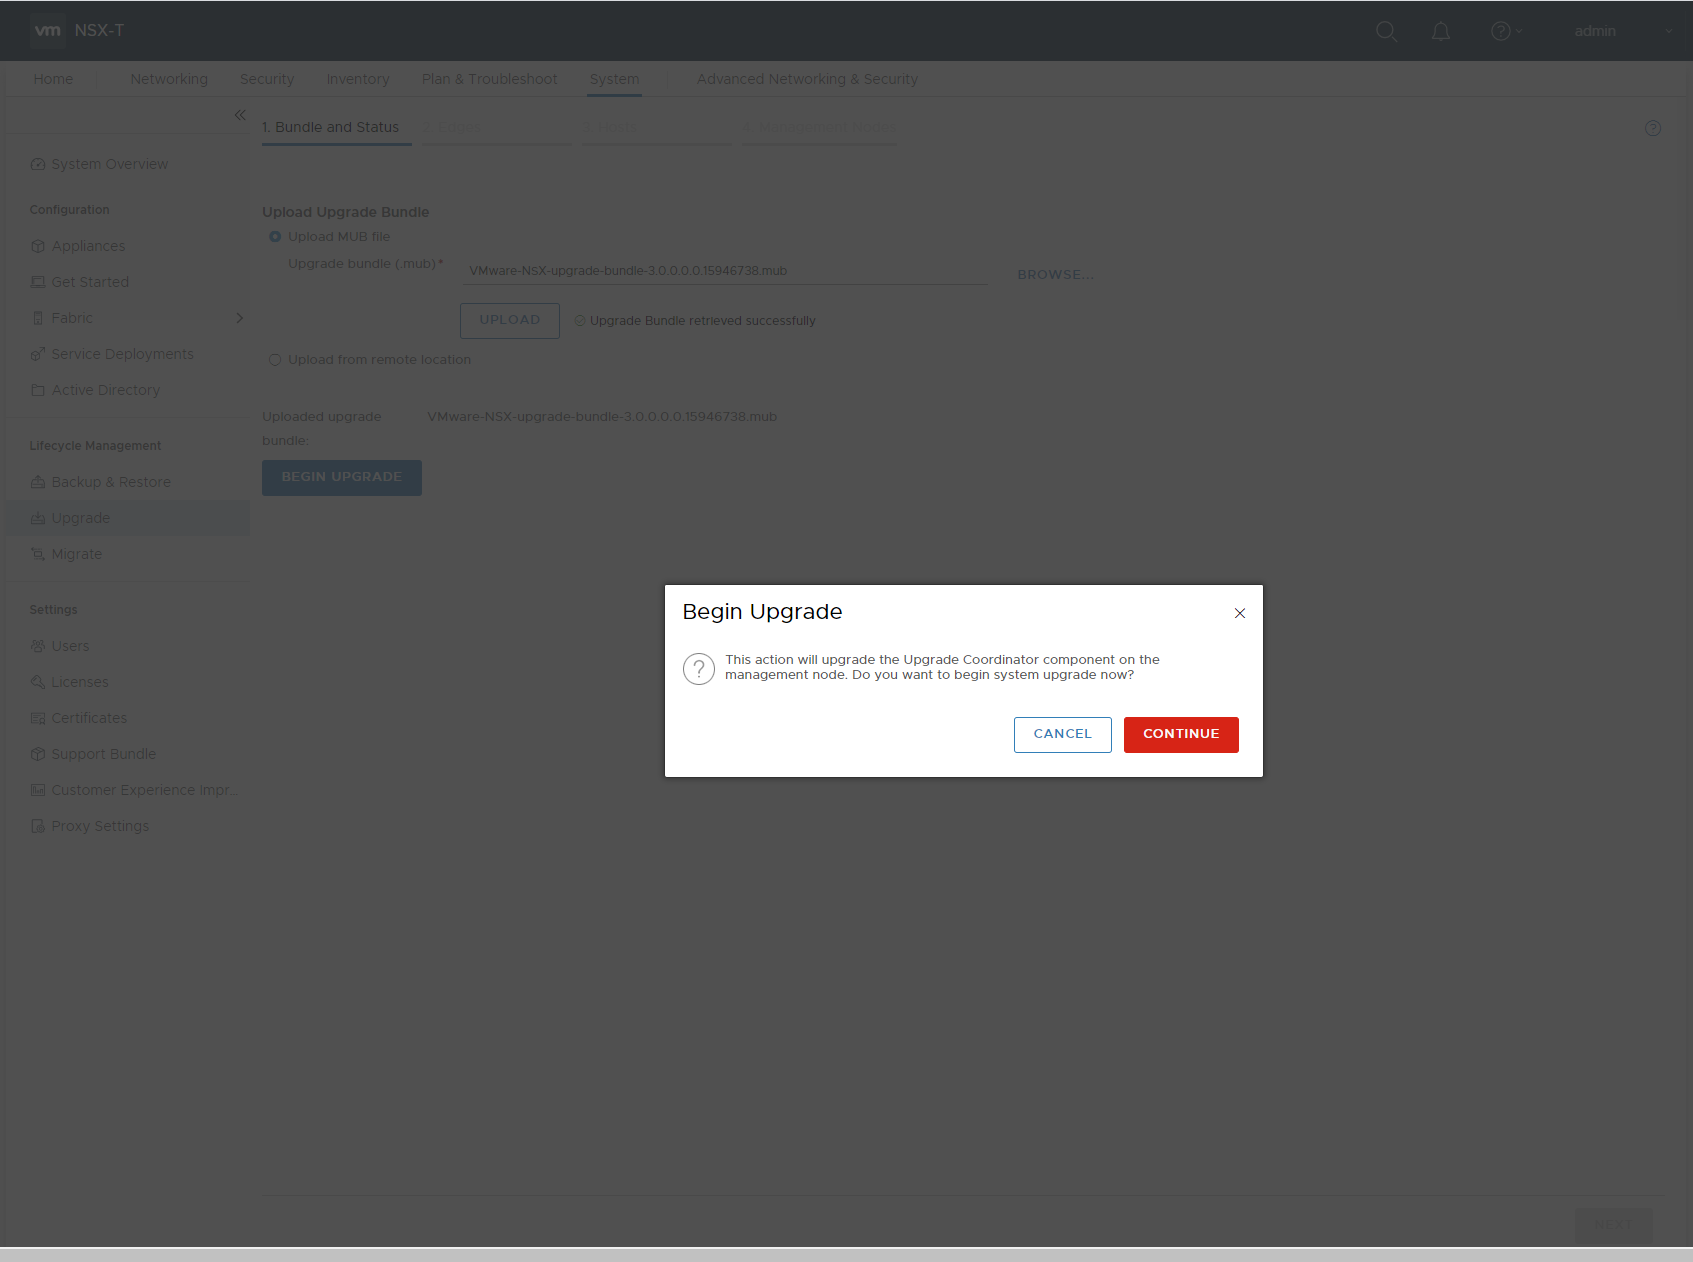
Once the upload is complete, select Begin Upgrade and advance to the screen where you can run the pre-checks to make sure everything is ready to go.
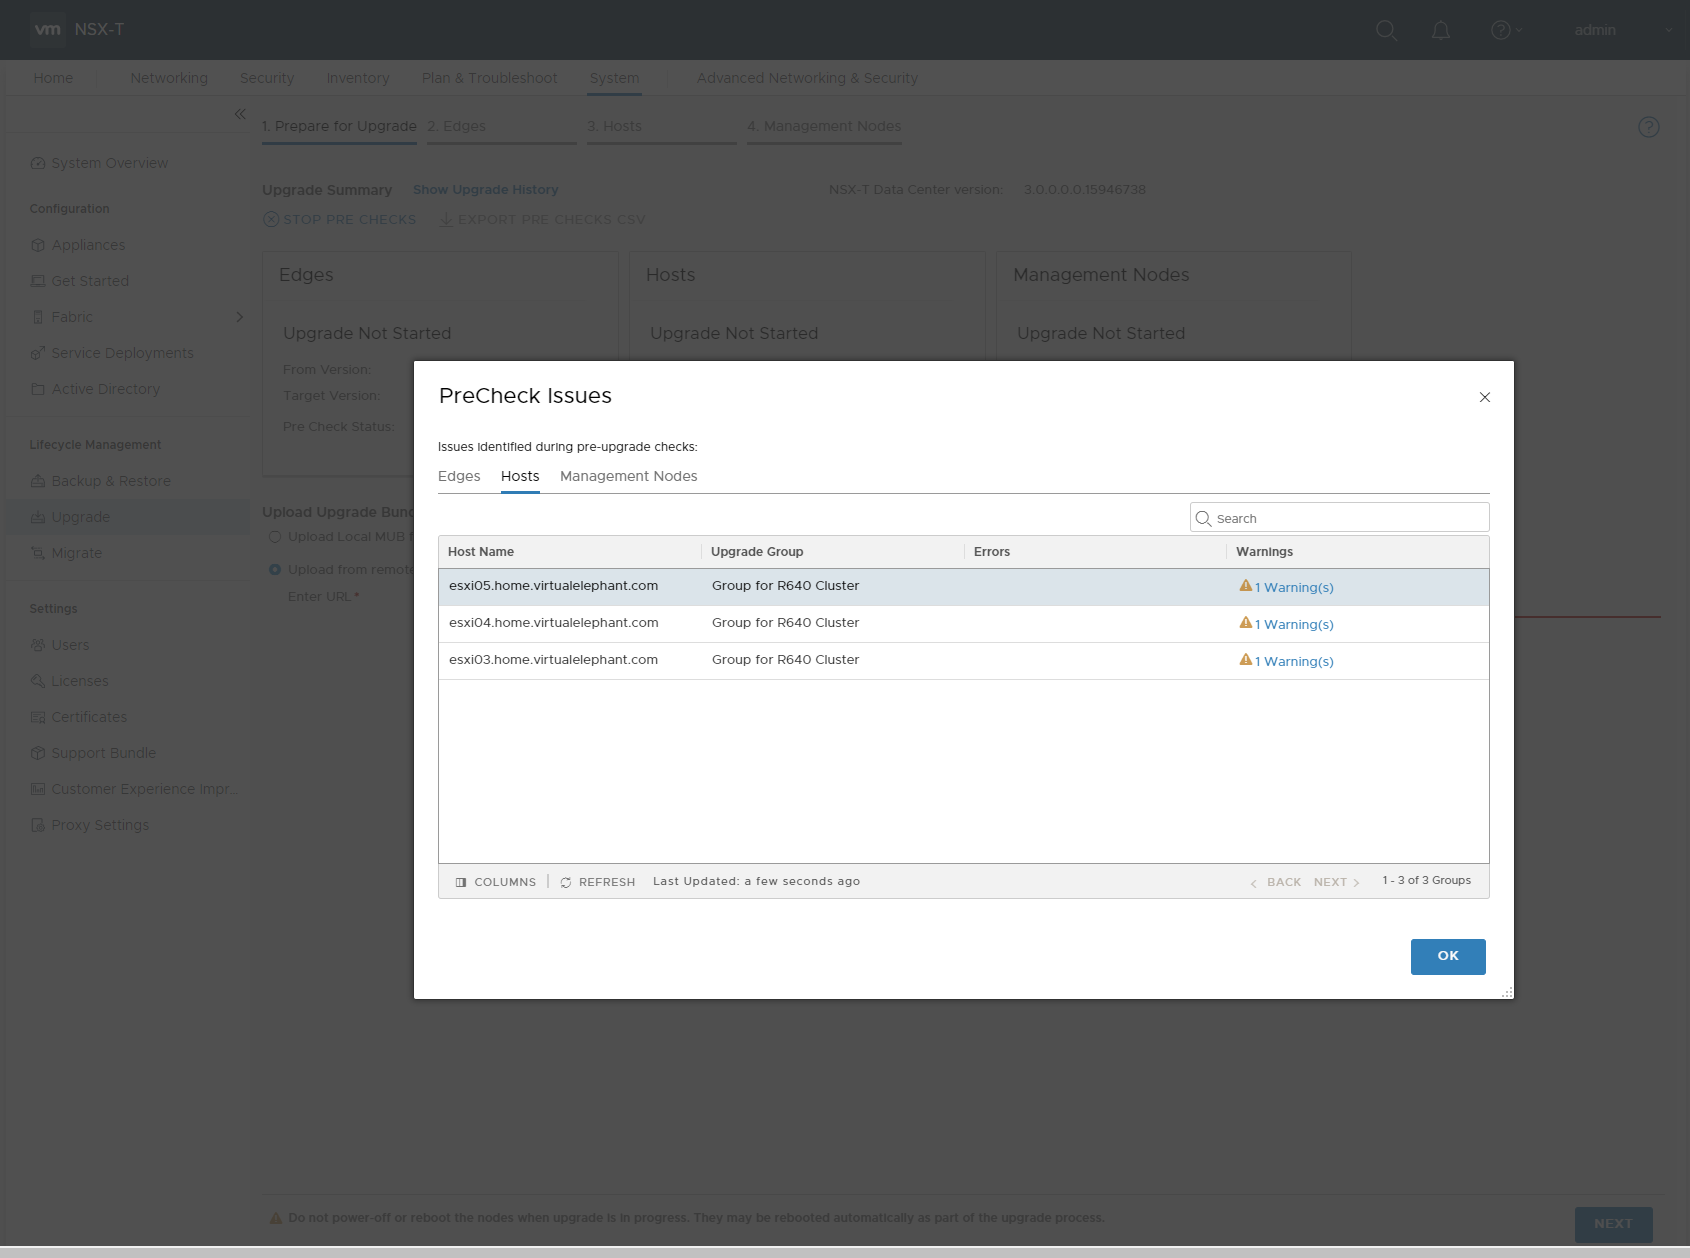
If the environment is healthy across the board, and you’ve done your due diligence making sure all of the prerequisites are met, the pre-check should come back just fine. If not, you’ll be able to see what errors or warnings they are by selecting the appropriate tile and looking at the messages.
Note: This is where I discovered the need for an additional 100Gb disk to be added to the NSX-T Manager VM. If you are running a cluster of NSX-T Manager VMs, you’ll need to add the disk to all of them.
Once you have a clean pre-check with zero errors, the environment is set to start the upgrade.
Upgrading to NSX-T 3.0
Advance to the Edges screen in the upgrade UI workflow and select the Start button in the top-right corner of the UI. This will initiate the upgrade on all of the Edge clusters you have within the environment.

This process took about 30 minutes within my Home SDDC environment and only had to upgrade a single Edge cluster with a single T0 and two T1s deployed. Your mileage may vary, depending on how large your environment is.
Once the Edge cluster(s) are upgraded you will be ready to advance to the Hosts screen.

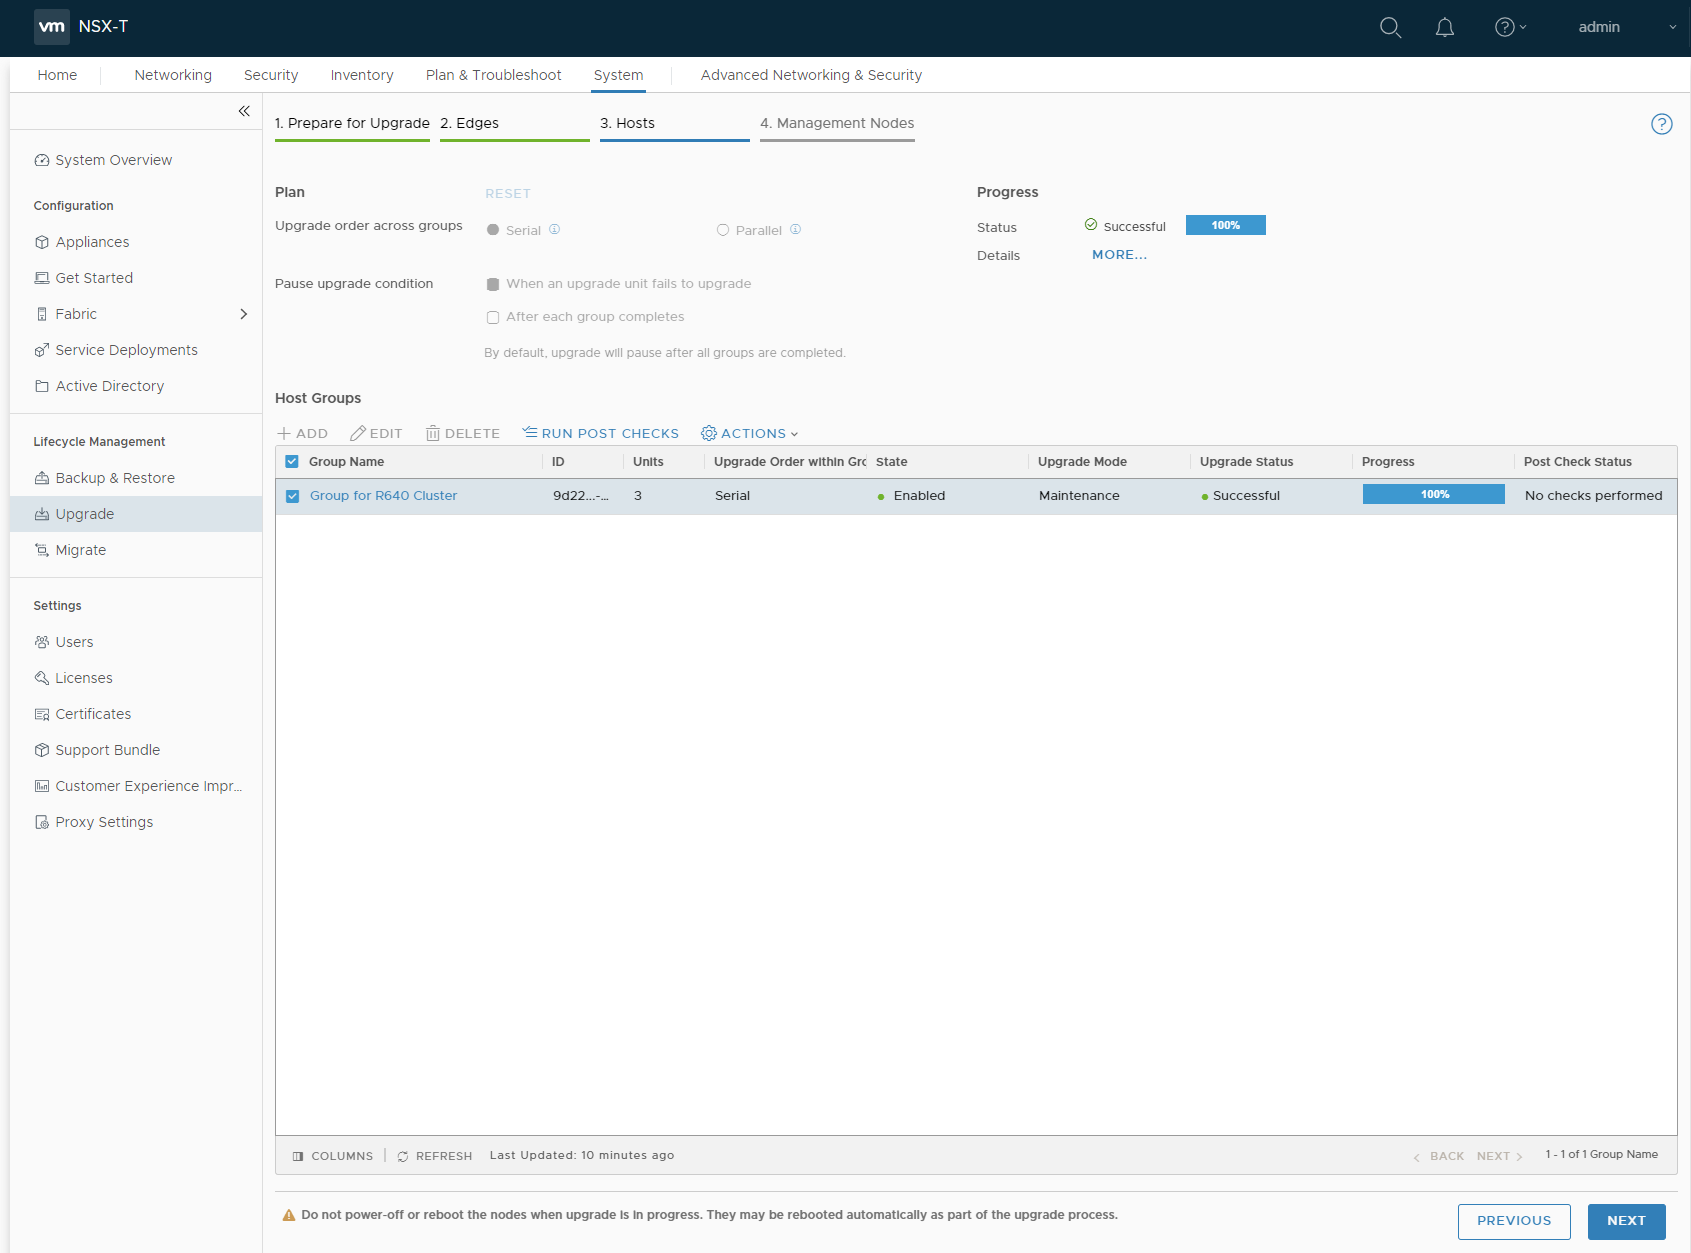
Once on the Hosts screen, you will see a listing of all the vSphere clusters prepared for NSX-T. Go ahead and press the Start button in the top-right corner again and monitor the progress as it proceeds to put each ESXi host into maintenance mode and upgrade the VIBs.
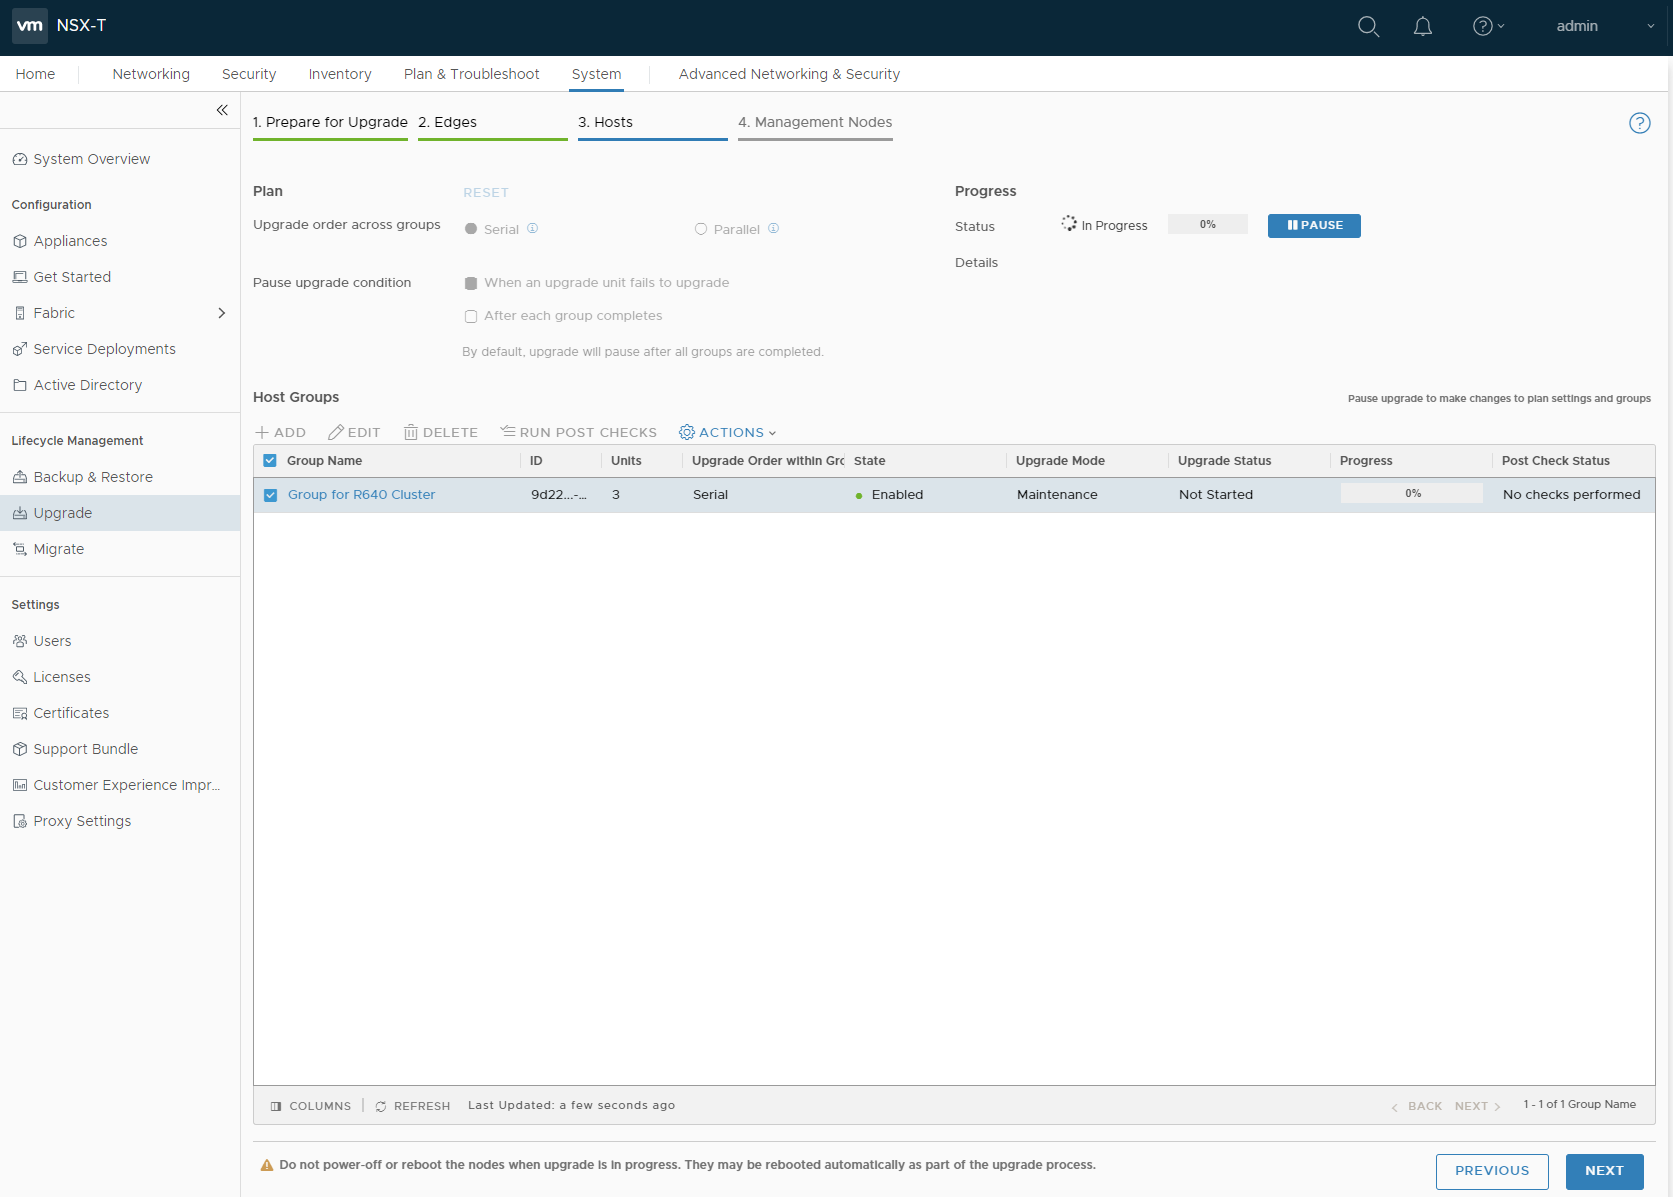
It is possible to see what steps are being performed by selecting the More link under Details on the UI screen. A pop-up window will appear and you can see the tasks being performed — you can also log into vCenter Server and see the open tasks.

Once completed, the final step in the upgrade process is to perform the upgrade on the NSX-T Manager VMs themselves. My lab only runs one NSX-T Manager, so if you have a cluster of 3 VMs this step may take a bit longer to complete.
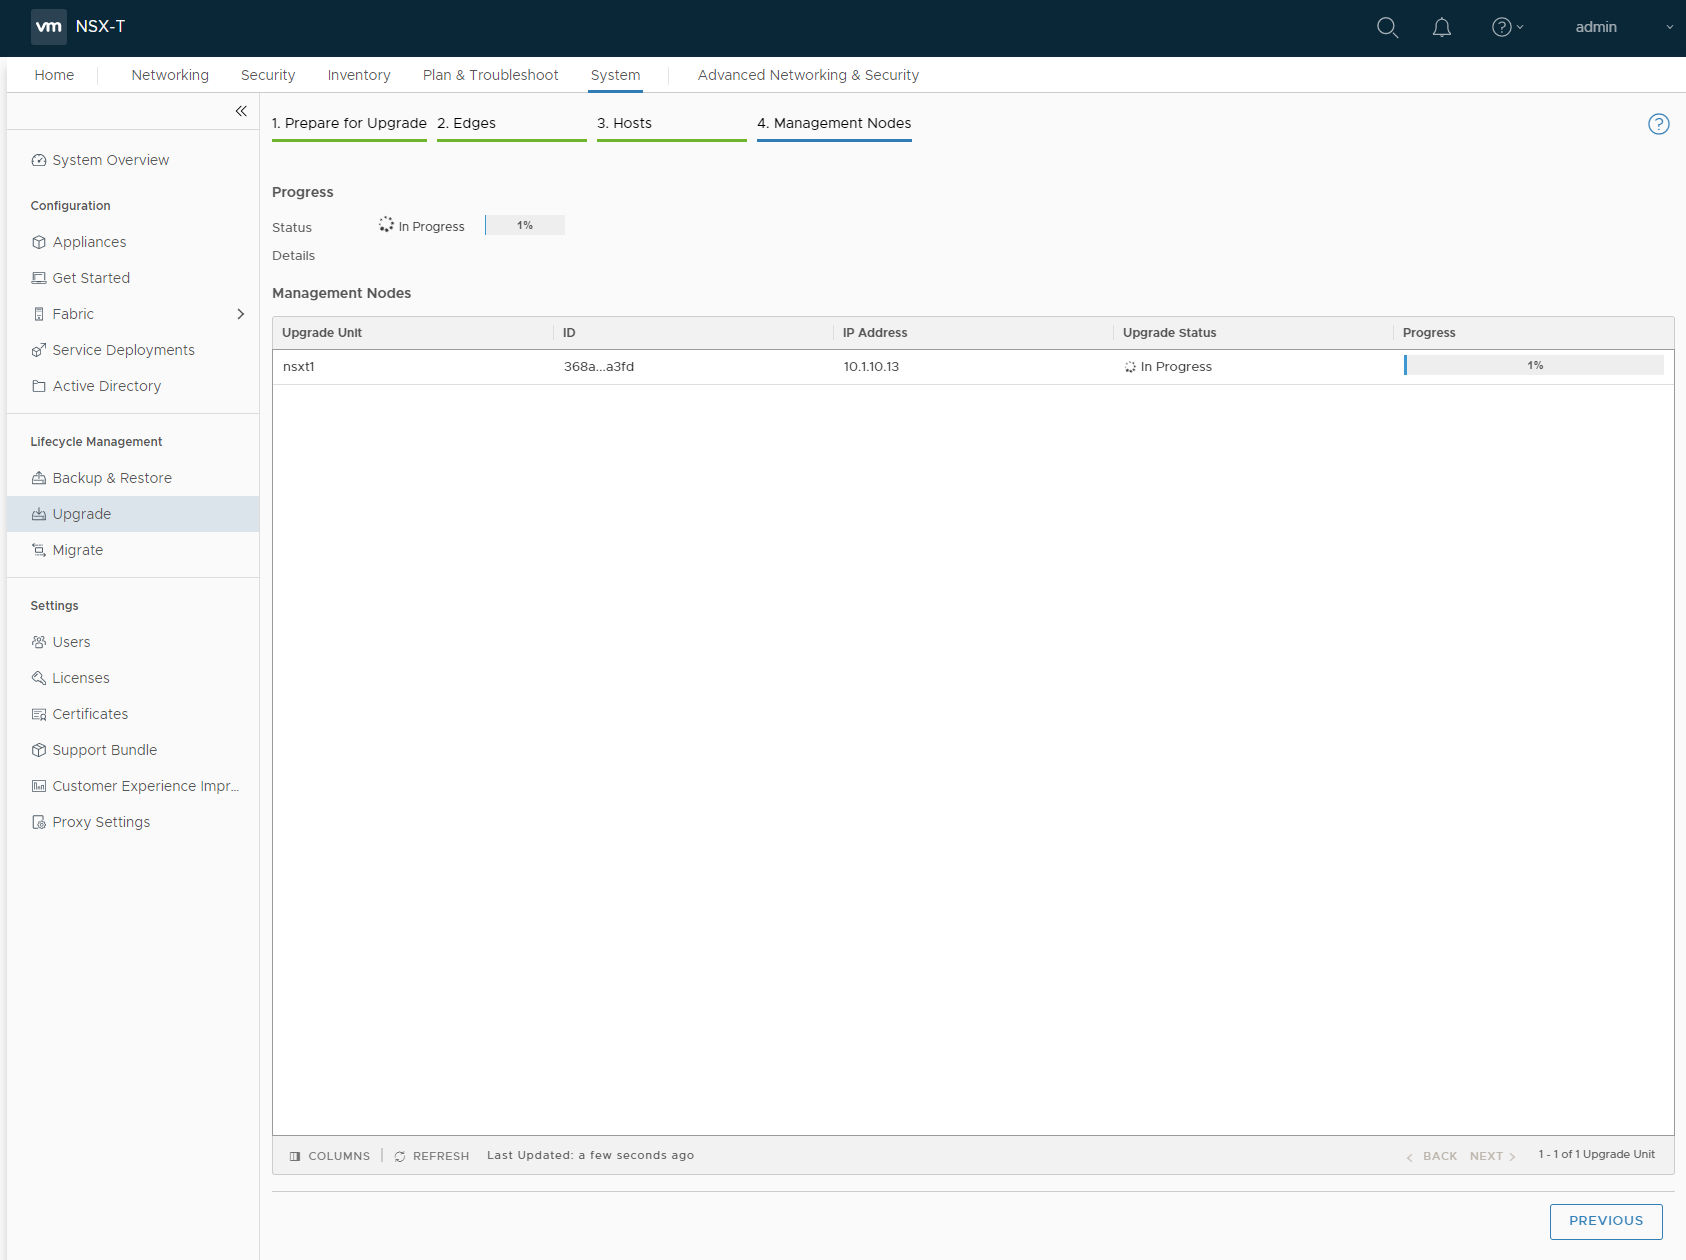
Once the NSX-T Manager cluster comes back online and you are able to login, you can confirm the upgrade completed successfully.

That’s it, you now have an environment successfully upgraded and fully running NSX-T 3.0.
Final Thoughts
If you didn’t read the release notes prior to performing the upgrade, I would recommend you do so. They are available here. That being said, I do want to call out a one thing in particular.
The N-VDS host switch is not consolidated into a vCenter Server VDS 7.0 in this release. That is a manual process that is going to take place in a subsequent NSX-T 3.0.x and vSphere 7.0x release. The consolidated vCenter VDS host switch is one of the features I’m most excited about in NSX-T 3.0 — I was never a fan of the separated, forked version that NSX-T leveraged originally.
Bottom line, before any upgrade we should be doing our due diligence to validate the upgrade is going to continue to meet our business and technical requirements, and work within our SDDC stack.
Enjoy!