The series so far has covered the high level design of the project, how to bootstrap CoreOS and understanding how Ignition works to configure a CoreOS node. The next stage of the project will begin to leverage Ansible to fully automate and orchestrate the instantiation of the environment. Ansible will initially be used to deploy the blank VMs and gather the IP addresses and FQDNs of each node created.
Ansible is one of the new technologies that I am using the Infrastructure-as-Code project to learn. My familiarity with Chef was helpful, but I still wanted to get a good primer on Ansible before proceeding. Fortunately, Pluralsight is a great training tool and the Hands-on Ansible course by Aaron Paxon was just the thing to start with. Once I worked through the video series, I dived right into writing the Ansible playbook to deploy the virtual machines for CoreOS to install. I quickly learned there were a few extras I needed on my Ansible control server before it would all function properly.
Step 1: Configure Ansible Control Server
As I stated before, I have deployed an Ubuntu Server 17.10 node within the environment where tftpd-hpa is running for the CoreOS PXEBOOT system. The node is also being leveraged as the Ansible control server (ACS). The ACS node required a few additional packages to be present on the system in order for Ansible to be the latest version and include the VMware modules needed.
To get started, the Ubuntu repositories only include Ansible v2.3.1.0 — which is not from the latest 2.4 branch.
![]()
There are several VMware module updates in Ansible 2.4 that I wanted to leverage, so I needed to first update Ansible on the Ubuntu ACS.
$ sudo apt-add-repository ppa:ansible/ansible
$ sudo apt-get update
$ sudo apt-get upgrade

If you have not yet installed Ansible on the local system, run the following command:

$ sudo apt-get install ansible

If you need to upgrade Ansible from the Ubuntu package to the new PPA repository package, run the following command:

$ sudo apt-get upgrade ansible
Now the Ubuntu ACS is running Ansible v2.4.1.0.

In addition to just having Ansible and Python installed, there are additional Python pieces we need in order for all of the VMware Ansible modules to work correctly.
$ sudo apt-get install python-pip
$ sudo pip install --upgrade pyvmomi
$ sudo pip install pysphere
$ sudo pip list | grep pyvmomi
Note: Make sure pyvmomi is running a 6.5.x version to have all the latest code.
The final piece I needed to configure was to include an additional Ansible module to allow for new VM folders to be created. There is a 3rd party module, called vmware_folder, which includes the needed functionality. After cloning the Openshift-ansible-contrib repo, I copied the following vmware_folder.py file into the ACS directory /usr/lib/python2.7/dist-packages/ansible/modules/cloud/vmware.
The file can found on GitHub at the following link.
The Ubuntu ACS node now possesses all of the necessary pieces to get started with the environment deployment.
Step 2: Ansible Playbook for deployment
The starting point for the project is to write the Ansible playbook that will deploy the virtual machines and power them on — thus allowing the PXEBOOT system to download and install CoreOS onto each node. Ansible has several VMware modules that will be leveraged as the project progresses.
The Infrastructure-as-Code project source code is hosted on GitHub and is available for download and use. The project is currently under development and is being written in stages. By the end of the series, the entire instantiation of the environment will be fully automated. As the series progresses, the playbooks will get built out and become more complete.
The main.yml Ansible playbook currently includes two tasks — one for creating the VM folder and a second for deployment of the VMs. It uses a blank VM template that already exists on the vCenter Server.
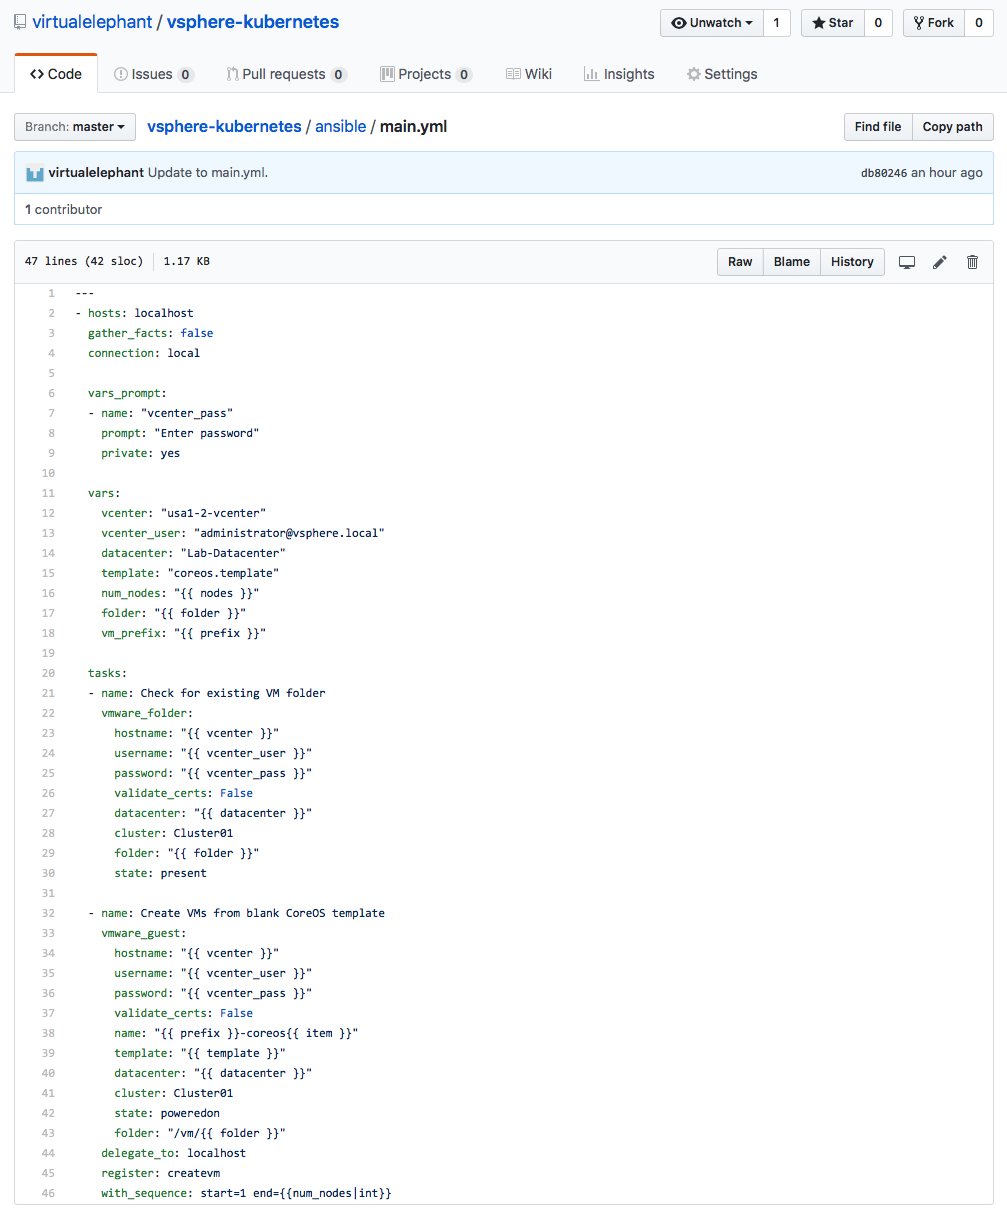
When the playbook is run from the ACS, it will deploy a dynamic number of nodes, create a new VM folder and allow the user to specify a VM-name prefix.
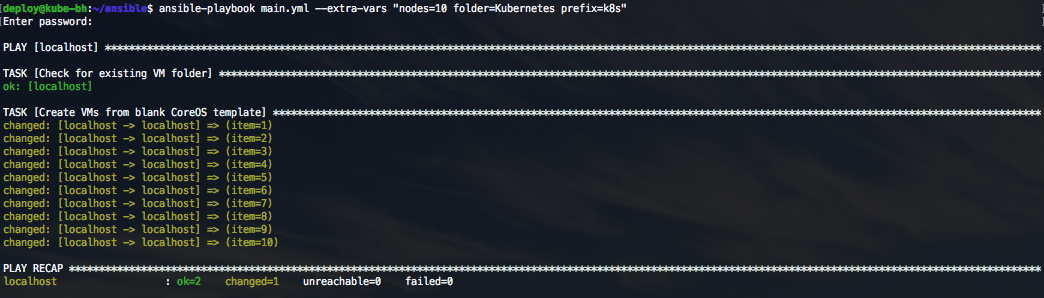
When the deployment is complete, the VMs will be powered on and booting CoreOS. Depending on the download speeds in the environment, the over/under for the CoreOS nodes to be fully online is roughly 10 minutes right now.
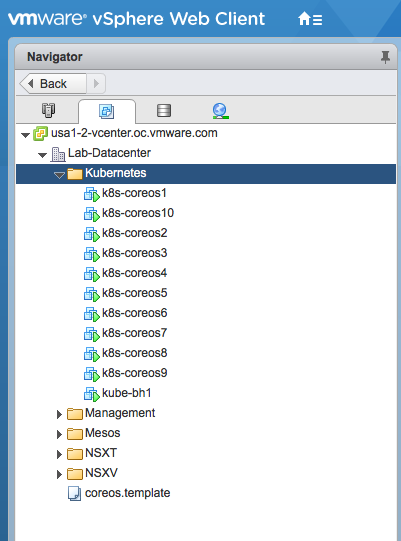
The environment is now deployed and ready for Kubernetes! Next week, the series will focus on using Ansible for installing and configuring Kubernetes on the nodes post-deployment. As always, feel free to reach out to me over Twitter if you have questions or comments.
[Introduction] [Part 1 – Bootstrap CoreOS with Ignition] [Part 2 – Understanding CoreOS Ignition] [Part 3 – Getting started with Ansible]